Doggie Door Installation
Doggie Door Installation
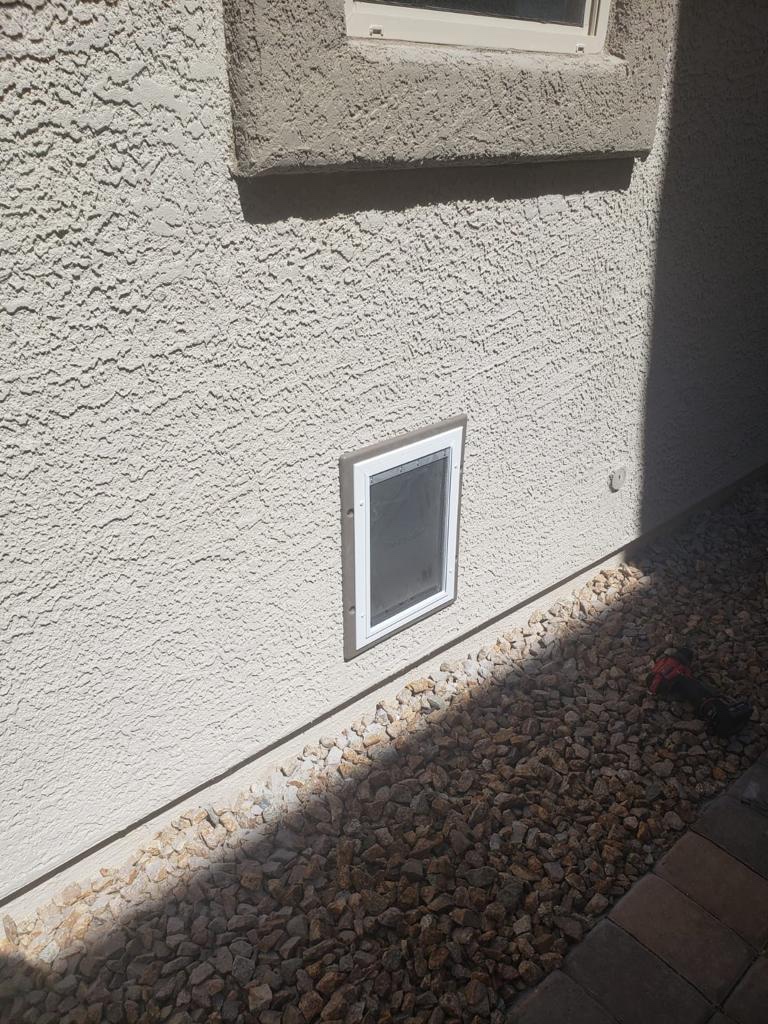
Install a dog door in a stucco wall requires some basic tools and careful planning. Here are the general steps:
- Choose a suitable location: Identify the best location on the wall for the dog door. It should be easily accessible for your dog and away from any potential hazards or obstructions.
- Mark the area: Use a pencil or marker to draw the outline of the dog door on the wall. Use a level to ensure that the outline is straight and even.
- Cut the hole: Use a jigsaw or reciprocating saw to cut along the outline. Be sure to wear protective goggles and a dust mask to protect yourself from flying debris. Start the cut at a slow speed to avoid cracking the stucco. Once you have made the initial cut, increase the speed to finish the cut. If the stucco is very hard, you may need to use a masonry bit to drill a few holes along the outline to make the cutting easier.
- Trim the edges: Use a chisel or sandpaper to smooth the edges of the hole. Be careful not to damage the surrounding stucco.
- Install the dog door: Follow the instructions provided with the dog door to install it in the hole. Most dog doors come with a frame that can be attached to the stucco with screws or adhesive.
- Test the door: Once the dog door is installed, test it to make sure it opens and closes properly. Encourage your dog to use the door and make any necessary adjustments to the installation as needed.
Remember, cutting a hole in a stucco wall can be challenging, and mistakes can be costly to repair. If you are unsure about any aspect of the process, it may be best to Call 4 Handyman a professional to install the dog door for you.



Leave a Reply