
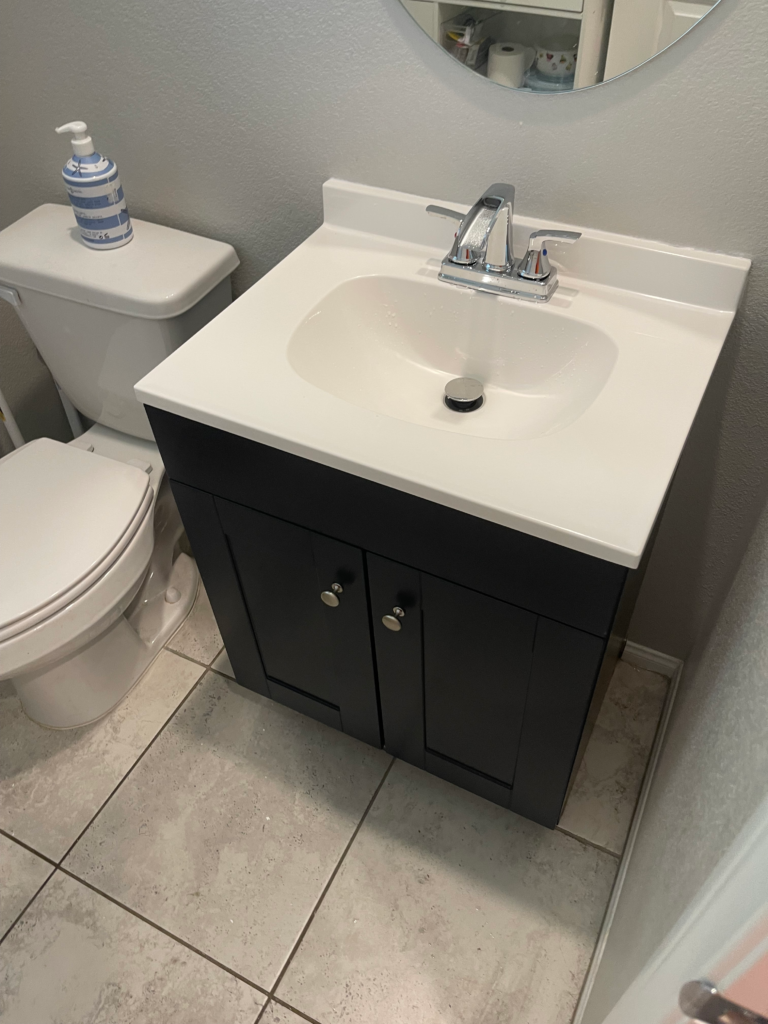
Replacing a pedestal sink with a bathroom vanity can completely change how a small bathroom looks, feels, and functions. In this recent Call 4 Handyman project, an existing white pedestal sink was removed and replaced with a dark cabinet-style vanity, integrated white sink top, and chrome faucet. The finished installation added useful enclosed storage while keeping the room bright and clean.
This real project is a good example of why bathroom vanity installation in Las Vegas is more than simply setting a cabinet against a wall. The job involves careful removal, plumbing connections, drain alignment, cabinet positioning, faucet installation, sealing, testing, and finish details.
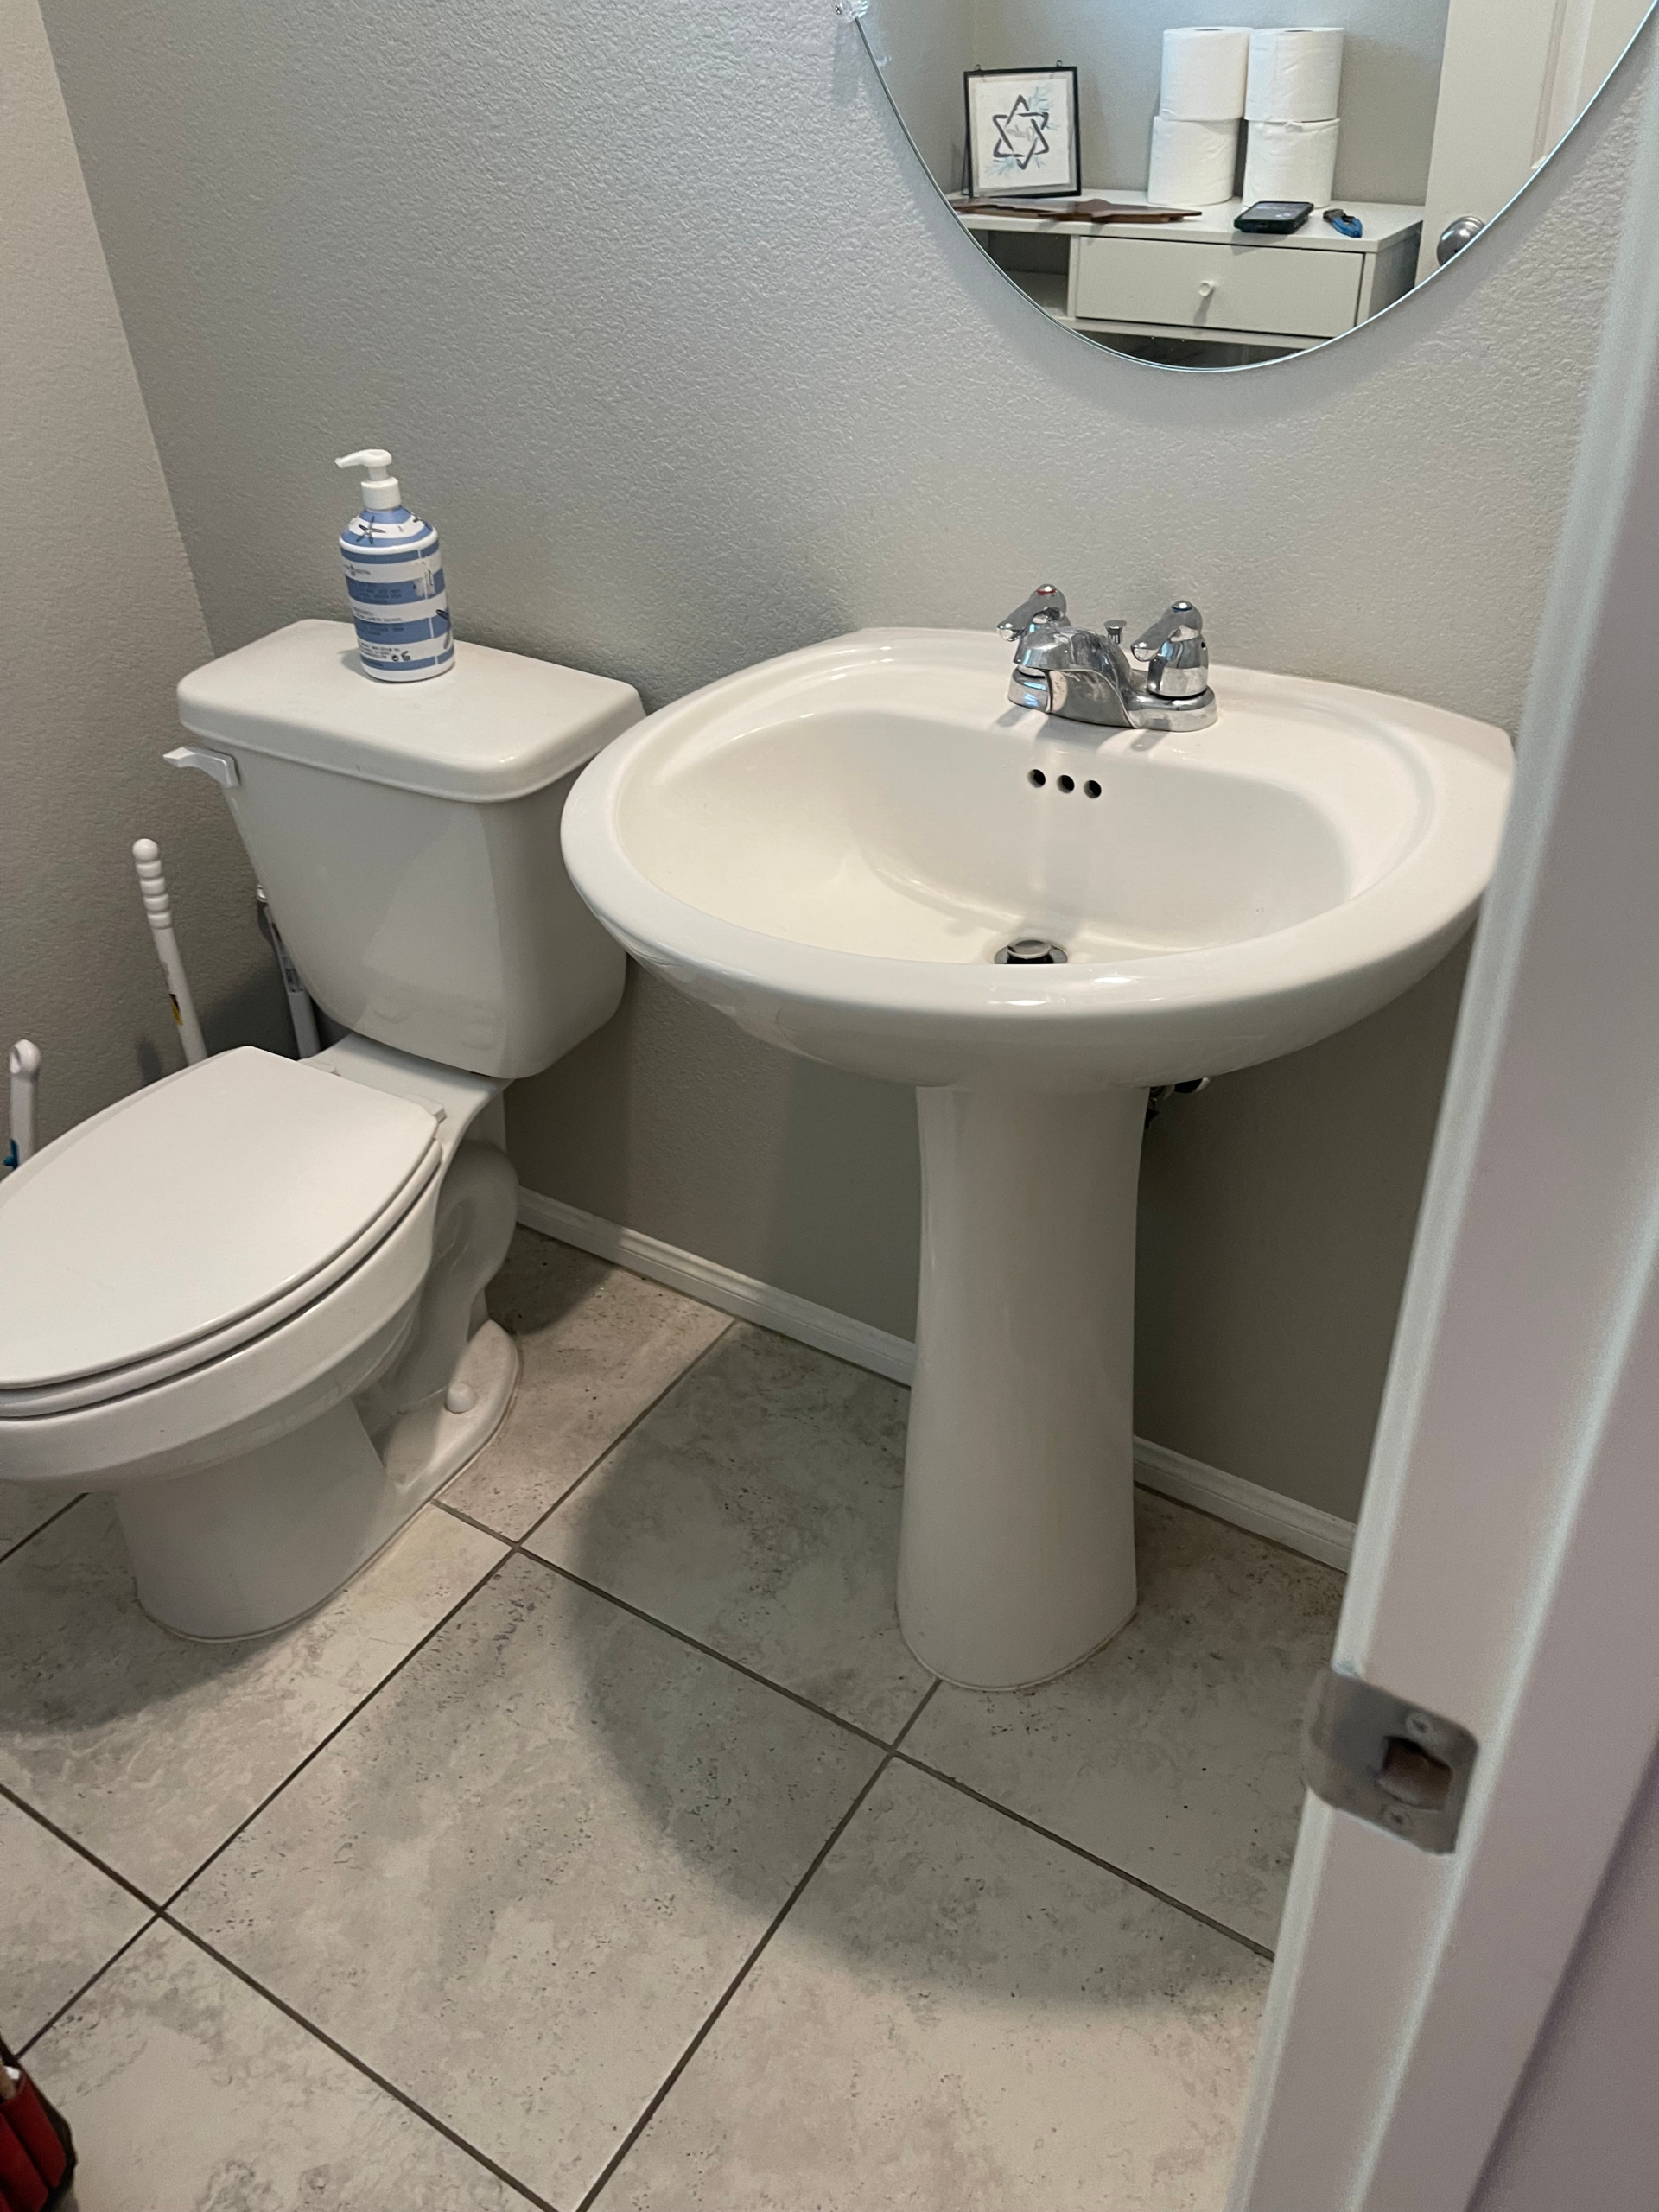
Before the Project: A Pedestal Sink With Limited Storage
The bathroom started with a traditional white pedestal sink. Pedestal sinks can work well in compact rooms because they have a light visual footprint, but their biggest limitation is storage. There is no cabinet for toiletries, cleaning products, extra paper goods, or other everyday bathroom items.
For this project, the goal was straightforward: remove the existing fixture and replace it with a vanity that would provide a more updated appearance and practical cabinet storage without overwhelming the small room.
Why Replace a Pedestal Sink With a Vanity?
A vanity combines several functions in one installation. It provides a sink, countertop area and storage while also concealing much of the plumbing below. In many bathrooms, that makes the space easier to organize and gives the room a more finished appearance.
The change can be especially useful in a powder room, guest bathroom or smaller primary bathroom where storage is limited. Even a compact vanity can create room for hand towels, cleaning supplies and daily-use products.
Homeowners considering a larger upgrade can also review our bathroom remodeling services in Las Vegas for projects involving vanities, showers, tile, fixtures and other improvements.
Step 1: Removing the Existing Pedestal Sink
The first stage was careful removal of the existing sink. Before disconnecting a fixture, the water supply must be controlled and the supply connections and drain assembly disconnected. Removal also has to account for how the sink is attached to the wall and floor so surrounding finishes are not unnecessarily damaged.
Once the pedestal sink was out, the plumbing area became fully accessible. This is an important point in a vanity conversion because a pedestal leaves the drain and supply lines exposed, while a cabinet must fit around those same connections.
Step 2: Checking the Existing Plumbing
Before setting the new cabinet permanently, the existing hot and cold supply locations and drain position need to be checked against the new vanity. Cabinet backs or interior panels may require carefully located openings so plumbing can pass through without excessive cutting.
Good planning here matters. Openings should provide the clearance required for installation and service while keeping the inside of the cabinet neat. The goal is a functional connection without turning the back of the cabinet into an unnecessarily large opening.
If a bathroom has leaking valves, damaged supply lines, faucet problems or other fixture concerns, see our faucet repair and replacement information as well.
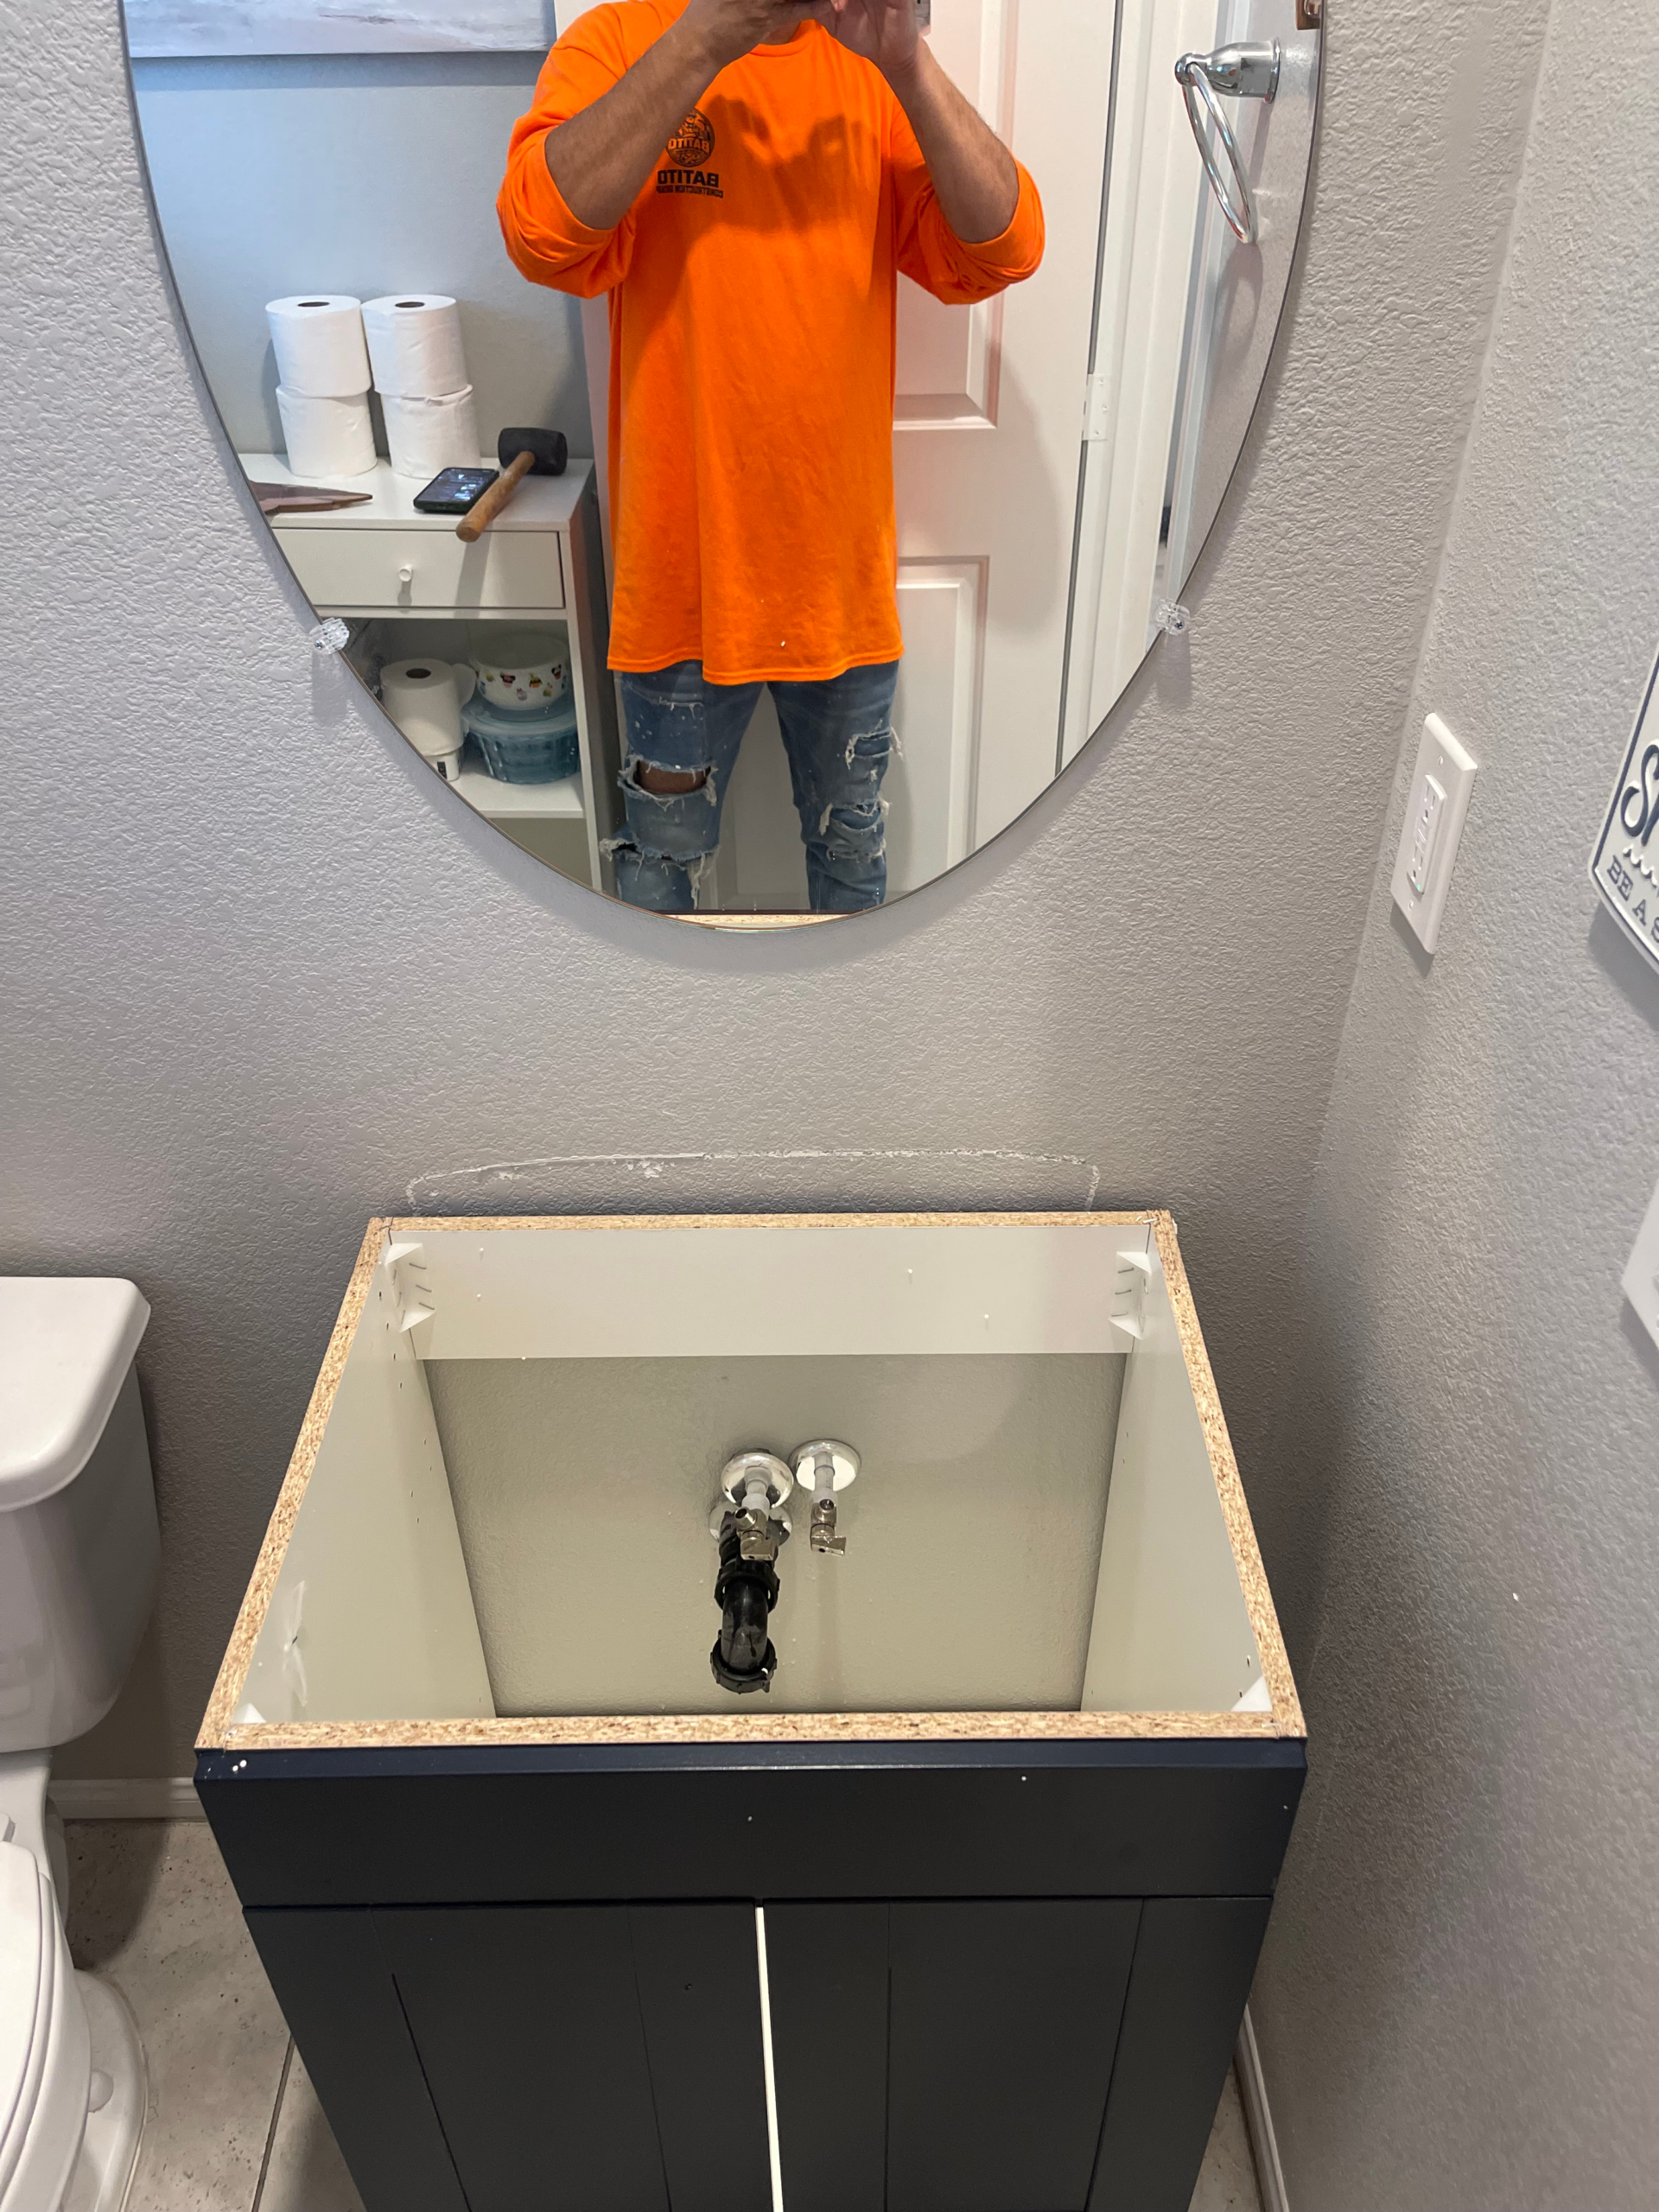
Step 3: Positioning the New Vanity Cabinet
The new dark vanity cabinet was positioned in the former pedestal-sink location. Proper positioning is critical because the cabinet must work with the plumbing while also sitting correctly in relation to the wall, toilet, doorway and usable floor space.
A vanity should be checked for level and stability before the top and plumbing are finalized. Walls and floors are not always perfectly straight or level, especially in existing homes, so installation often requires small adjustments rather than assuming everything is square.
Step 4: Installing the Sink Top and Faucet
The new vanity uses a bright white integrated sink top that creates strong contrast with the dark cabinet. A chrome faucet completes the update. Before final connections, faucet components and drain hardware need to be assembled correctly and secured according to the fixture requirements.
The countertop also needs to sit correctly on the cabinet and against the wall. Where appropriate, joints are sealed to help prevent routine sink splashes from getting behind the vanity.
Step 5: Reconnecting the Water Supply and Drain
After the vanity and top were positioned, the hot and cold water supplies and sink drain were connected. This part of the project deserves careful attention because a bathroom can look perfect while a small hidden leak creates problems later.
Connections should be inspected and tested after the water is restored. The faucet should operate normally, the basin should drain correctly, and supply and drain joints should remain dry during testing.
Step 6: Finishing and Checking the Installation
A quality vanity replacement is not complete when the faucet first turns on. The cabinet, countertop, drain, supply connections, doors and surrounding area all need a final check. Doors should open properly, the cabinet should remain stable, and the installation should look intentional within the room.
The finished project shows how a relatively focused bathroom improvement can make a noticeable difference without requiring a complete demolition of the room.
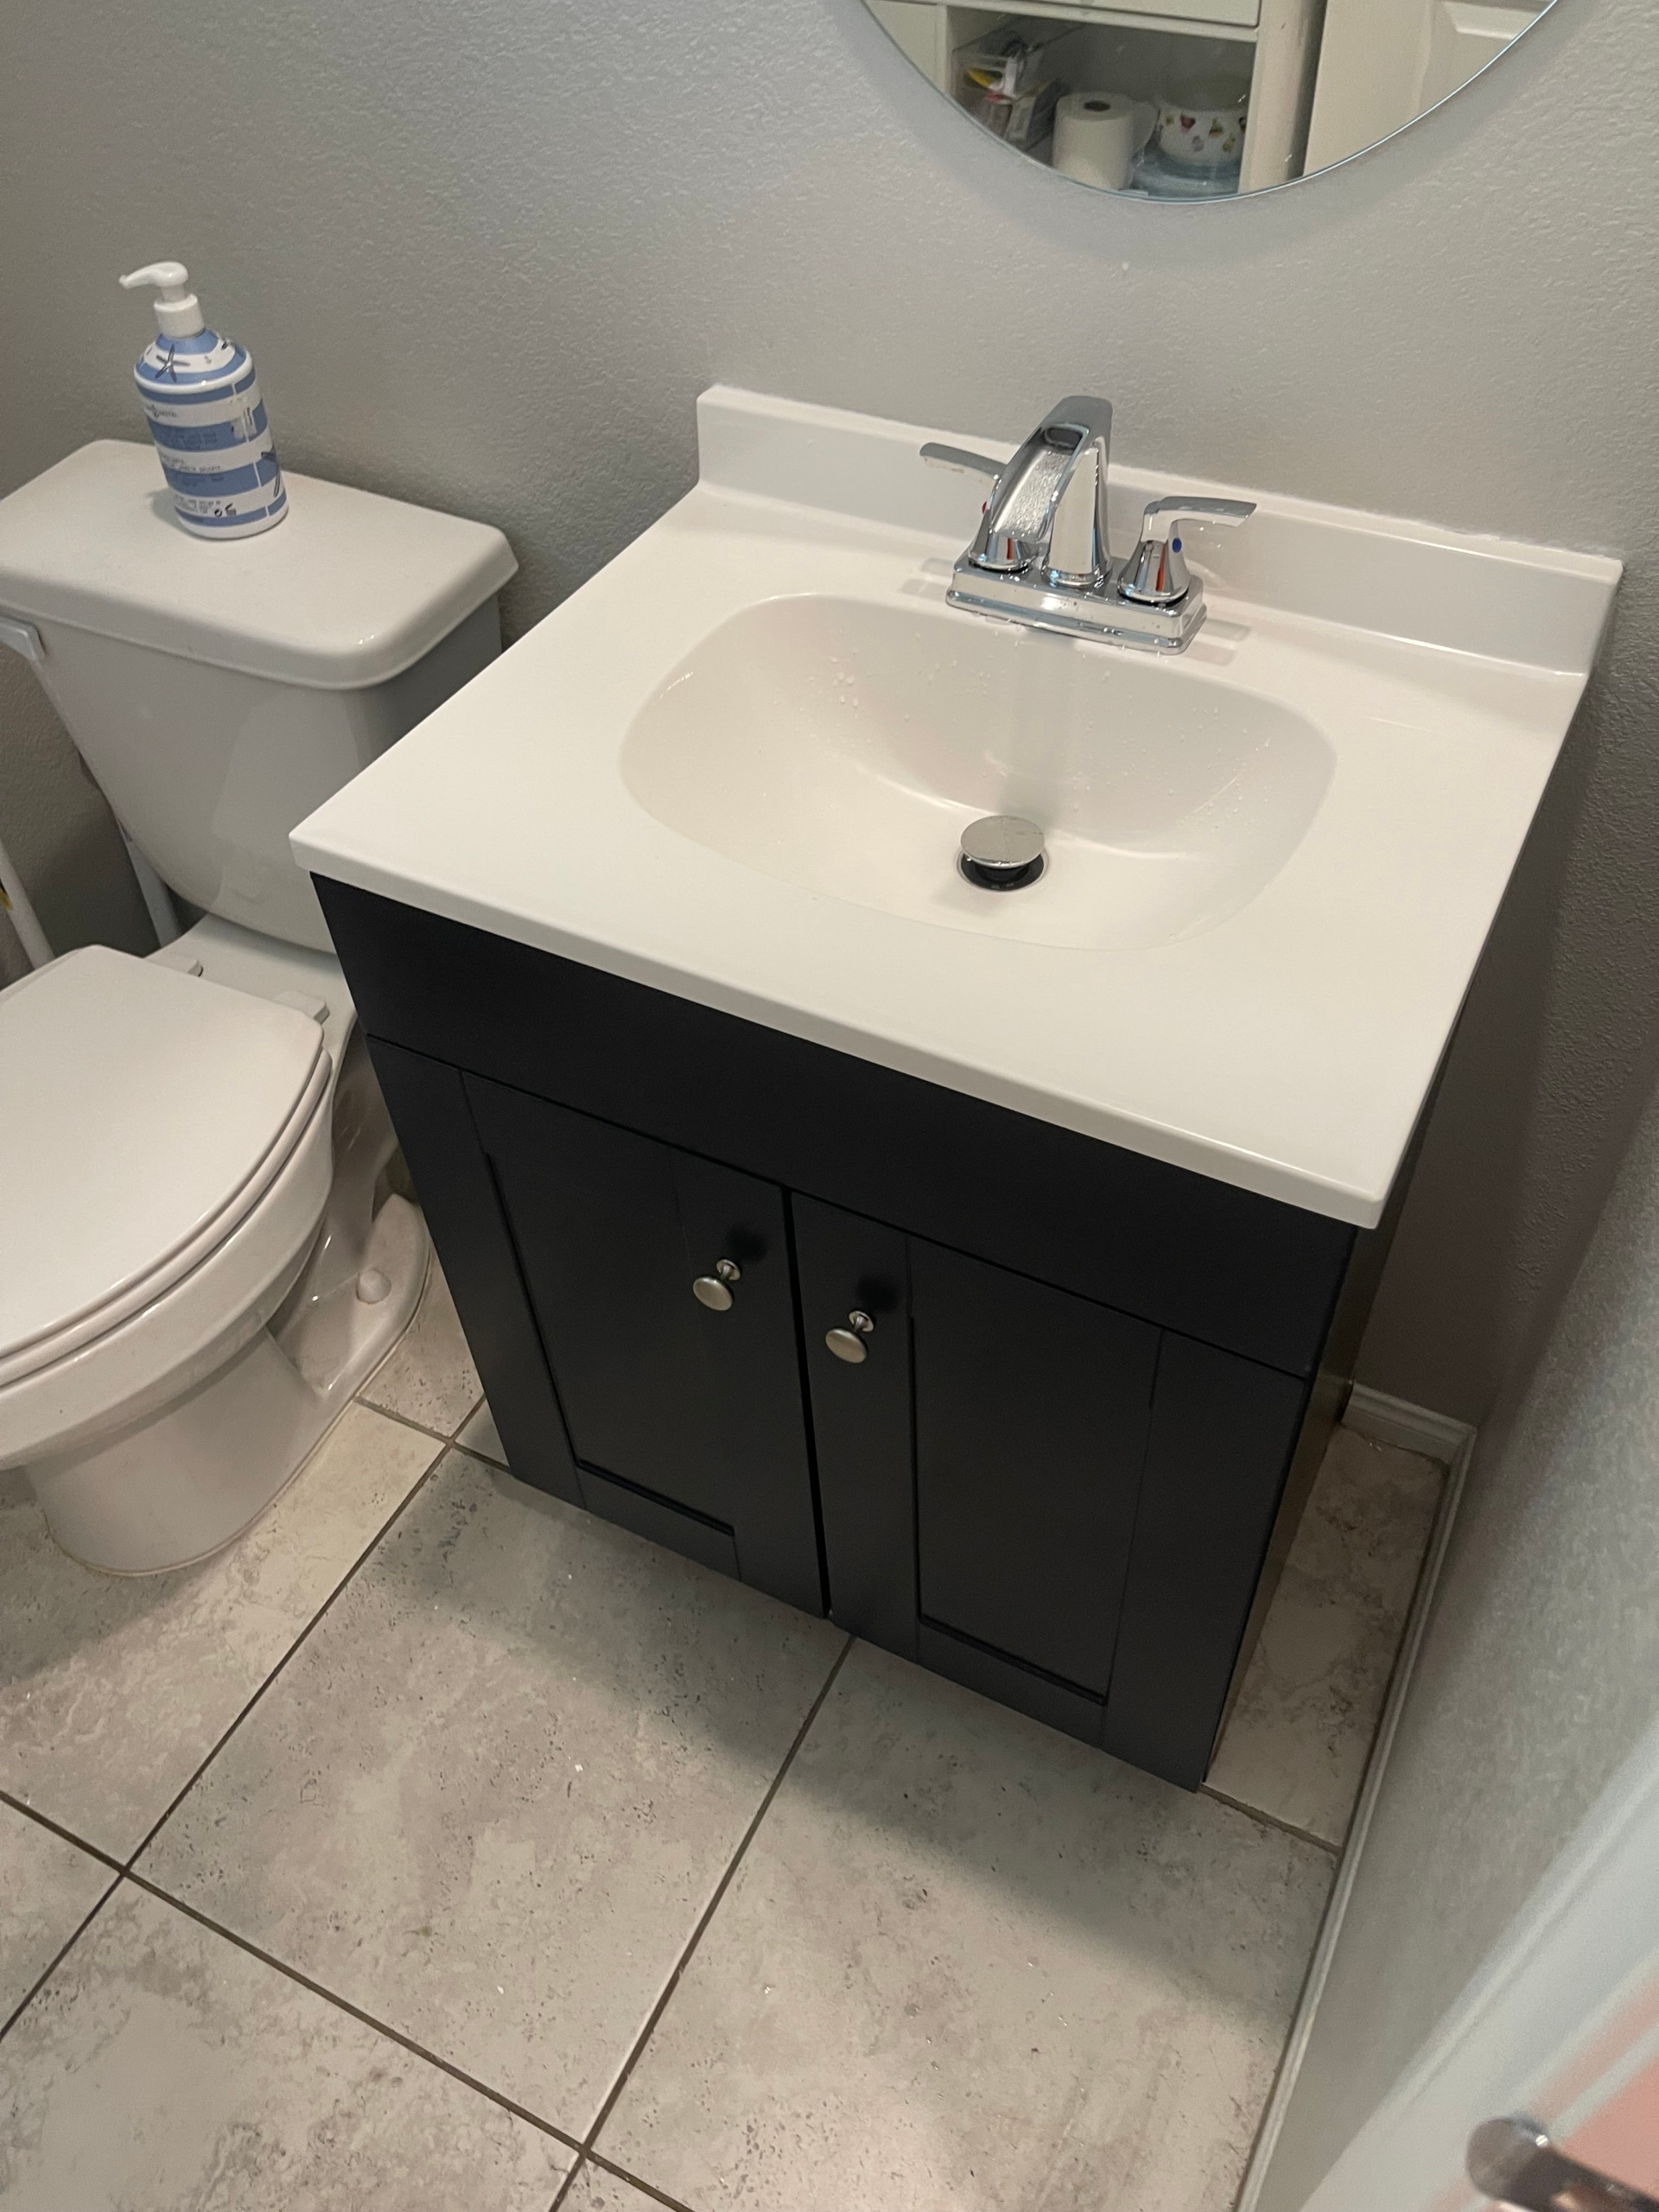
Before and After: What Changed?
The most visible difference is the move from an open pedestal sink to a cabinet vanity. The original fixture provided a sink but essentially no usable storage. The replacement adds enclosed cabinet space and a larger usable surface around the basin.
The dark cabinet also gives the bathroom a stronger visual anchor. Against the light walls, floor and white fixtures, the contrast creates a modern, clean look. The existing toilet, flooring and mirror could remain, showing that a bathroom can receive a meaningful update without replacing every component.
What Is Involved in a Pedestal-Sink-to-Vanity Conversion?
Every bathroom is different, but a typical conversion may involve protecting the work area, shutting off water, disconnecting supply lines, removing the existing sink, evaluating plumbing locations, preparing the new cabinet, positioning and leveling the vanity, installing the top and faucet, connecting the drain and supplies, sealing appropriate joints, testing for leaks and cleaning the work area.
Sometimes additional work is discovered after removal. A former pedestal footprint may expose wall marks, missing paint, baseboard gaps or flooring differences. Plumbing may also require adjustment if the new cabinet configuration does not align with the existing drain or supply locations.
Choosing the Right Vanity for a Small Bathroom
Size should come before style. Measure the available width, depth and height, but also consider door swing, toilet clearance and walking space. A vanity that technically fits between two walls can still be too deep for comfortable movement.
Plumbing position matters too. Before buying a vanity, look at where the drain and water supplies enter the wall. Drawers, shelves and cabinet dividers can conflict with existing plumbing. Choosing a cabinet compatible with the room can reduce unnecessary modifications.
Countertop and sink configuration are another consideration. Integrated tops can provide a clean appearance and simplify the number of separate components. Other projects may use a separate countertop and undermount or vessel sink depending on the design.
Bathroom Vanity Installation vs. Full Bathroom Remodeling
Not every bathroom needs a complete remodel. If the flooring, toilet, shower or tub and walls are in good condition, changing the vanity can be a targeted way to improve storage and appearance.
A full remodel makes more sense when several systems or finishes need attention at the same time—for example, replacing the shower, changing tile, moving fixtures, repairing extensive wall damage and installing a new vanity together. For shower-specific projects, visit our shower remodeling Las Vegas page.
Common Problems That Can Appear During Vanity Replacement
Existing bathrooms sometimes reveal conditions that are not obvious until the old fixture is removed. Examples include drain alignment problems, aging shutoff valves, wall damage behind the old sink, uneven flooring, missing baseboard, countertop gaps caused by an out-of-square wall, or a cabinet shelf that conflicts with the drain.
These conditions do not automatically mean the project becomes a full remodel. They simply need to be evaluated and handled appropriately before the new installation is completed.
Why Leak Testing Matters
Water-related issues around a vanity can damage the cabinet, baseboard, drywall and flooring if they go unnoticed. After installation, supply connections and the drain should be checked while the faucet is operating and while water drains from a filled or partially filled basin.
Homeowners should also periodically look inside the vanity after installation. Catching a loose fitting or slow drip early can prevent a much larger repair.
Vanity Installation as Part of a Bathroom Refresh
A vanity replacement can be paired with other smaller improvements to refresh a bathroom. Depending on the room, that might include a new faucet, mirror, light fixture, hardware, paint, baseboards or drywall touch-ups.
For wall repairs around removed fixtures or remodeling work, our drywall repair Las Vegas service can address patches and finish work. For repainting after repairs or fixture changes, see painting services in Las Vegas.
Bathroom Vanity Installation in Las Vegas
Call 4 Handyman handles bathroom fixture upgrades and vanity installation for homeowners and property owners throughout the Las Vegas Valley. Our work includes removal and replacement projects like the one shown here as well as broader bathroom improvement work.
We also serve nearby communities. If your project is outside central Las Vegas, explore our bathroom remodeling Henderson, bathroom remodeling North Las Vegas, and bathroom remodeling Summerlin pages.
Frequently Asked Questions About Bathroom Vanity Replacement
Can a pedestal sink be replaced with a vanity?
Often, yes. The key factors are the available space, existing plumbing locations, cabinet configuration and condition of the wall and floor after the pedestal is removed.
Can the existing plumbing stay in place?
Sometimes. If the drain and supply locations work with the new cabinet and sink, major relocation may not be necessary. Other vanity designs may require plumbing adjustments.
Does the wall need repair after removing a pedestal sink?
It depends on how the old sink was mounted and what is exposed after removal. Minor holes, marks or finish differences may need patching or touch-up work.
Can I install a vanity without remodeling the whole bathroom?
Yes. This project is a good example: the vanity and sink were upgraded while the existing toilet, tile floor and mirror remained in place.
Should a new faucet be installed at the same time?
It is common to install the faucet while the new sink top is being installed. The faucet must match the hole configuration of the selected top.
What should I measure before choosing a vanity?
Measure available width, depth and height and check clearances around the toilet, doorway and walking path. Also note drain and water-supply locations and the internal layout of the cabinet.
Do you handle other bathroom repairs?
Call 4 Handyman works on a range of bathroom and home-repair projects. Browse our before-and-after project gallery to see more real work.
A Small Bathroom Upgrade With a Big Functional Difference
This before-and-after project demonstrates the practical value of replacing a pedestal sink with a cabinet vanity. The bathroom gained enclosed storage, additional surface area and a more updated appearance while retaining the existing floor, toilet and mirror.
If you are considering a similar project, Call 4 Handyman can evaluate the existing fixture, plumbing and available space and help with the installation. Learn more on our dedicated Bathroom Vanity Installation Las Vegas page.
Request an estimate: Call 702-752-0758 or visit Call 4 Handyman Las Vegas. Licensed, Insured & Bonded.
Project note: The photographs in this article show an actual vanity replacement project. Conditions vary by property, and the appropriate installation approach depends on the existing plumbing, cabinet, wall and floor conditions.