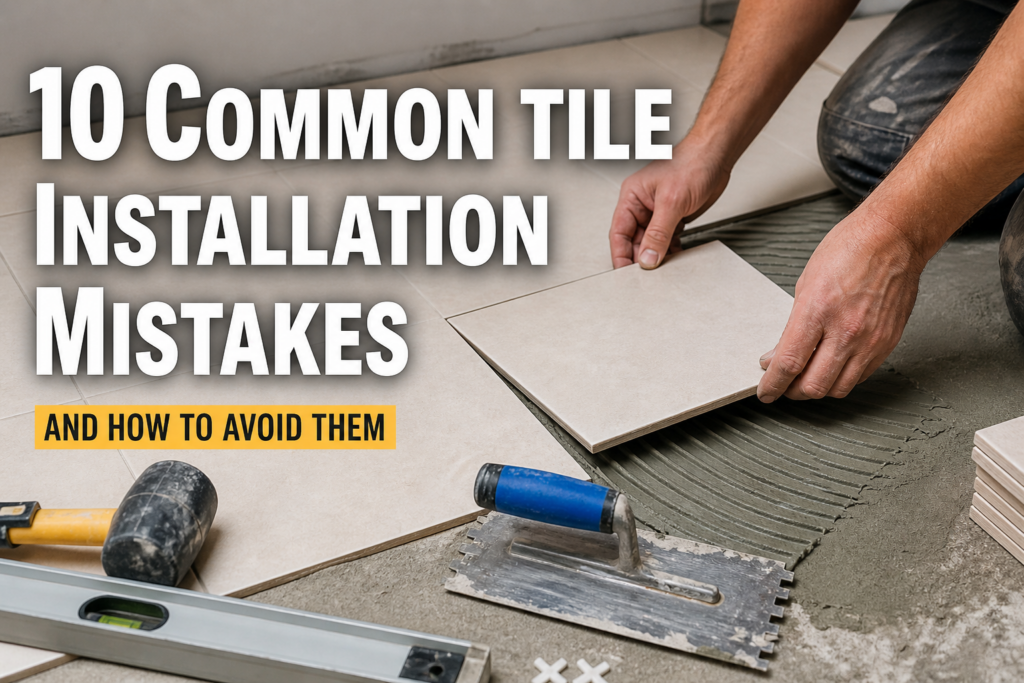
Tile installation is one of the most transformative home improvement projects you can undertake. Whether it’s a sleek new kitchen backsplash, a durable bathroom floor, or a stunning walk-in shower, the right tile can completely redefine your space. However, achieving that professional finish is harder than it looks. Many homeowners in Las Vegas attempt a DIY approach only to find themselves facing uneven surfaces, cracked tiles, or crumbling grout just a few months later. This article explores the top 10 common tile installation mistakes and, more importantly, how you can avoid them to ensure your project stands the test of time.
1. Mismatching the Trowel Size
One of the most frequent errors occurs before the first tile is even laid: choosing the wrong trowel. Trowel notches aren’t just for show; they determine the depth of the mortar bed. If the notches are too small, there won’t be enough thin-set to support the tile, leading to hollow spots and eventual cracking. Conversely, notches that are too large can cause mortar to squeeze up through the grout lines, creating a messy cleanup.
How to Avoid It: Always match your trowel size to the dimensions of your tile. For standard 12×12 tiles, a 1/4″ x 3/8″ square-notch trowel is often recommended. For larger format tiles (anything over 15 inches on one side), you’ll need a larger notch, such as 1/2″ x 1/2″, and specifically look for “medium-bed” mortar. If you’re unsure, a quick consultation with a Las Vegas handyman can save you hours of frustration.
2. Skipping the “Back Buttering” Step
Even with the perfect trowel, achieving 100% coverage on large or heavy tiles is difficult. “Back buttering” is the process of applying a thin layer of mortar to the back of the tile itself before placing it on the troweled surface. Skipping this step often results in air pockets, which weaken the bond and make the tile susceptible to breaking under pressure.
How to Avoid It: For any tile larger than 8×8 inches, get into the habit of back buttering. Use the flat side of your trowel to spread a thin, even “skim coat” of thin-set on the back of every tile. This ensures a “wet-to-wet” bond that maximizes adhesion, particularly important in the dry, high-heat climate of Southern Nevada, where mortar can skin over quickly.
3. Improper Subfloor and Wall Preparation
Tile is only as good as the surface beneath it. If you’re tiling over a subfloor that is uneven, bouncy, or dirty, your tiles will eventually fail. Many DIYers make the mistake of tiling directly over old vinyl, painted drywall, or plywood without proper preparation. Debris, grease, or moisture on the substrate prevents the mortar from sticking, leading to “loose” tiles that click when you walk on them.
How to Avoid It: Ensure your substrate is “dead flat” and structurally sound. For floors, install a cement backer board or an uncoupling membrane (like Schluter-DITRA) over plywood to provide a rigid, waterproof base. For walls, especially in kitchens, scrub away all grease and fingerprints. If the surface is significantly out of level, use a self-leveling underlayment before you begin.
4. Incorrect Layout Planning
Nothing screams “amateur” like a sliver of tile at the edge of a room or an off-center pattern in a shower. Many people start tiling in one corner and work their way across, only to find that the last row requires a half-inch strip of tile that is nearly impossible to cut and looks terrible.
How to Avoid It: Never start in a corner. Instead, find the center point of the room or wall and snap chalk lines to create a grid. “Dry lay” your tiles first to see how they fall at the edges. If you end up with tiny slivers, shift your center line slightly to balance the layout. In Las Vegas homes with open floor plans, planning the transition between rooms is crucial for a seamless look.
5. Using the Wrong Adhesive
Not all “glue” is created equal. Using basic mastic in a high-moisture area like a shower or using a standard thin-set for heavy natural stone can lead to disastrous results. Mastic is organic and can support mold growth if it gets wet, while certain thin-sets aren’t strong enough to hold large porcelain or marble tiles on a vertical surface.
How to Avoid It: Read the labels carefully! Use a high-quality, polymer-modified thin-set for most floor and wall applications. If you are tiling a swimming pool area or a steam shower, you’ll need specialized waterproof adhesives. For heavy wall tiles, look for “non-sag” mortars that hold the tile in place instantly.
Read Also: Signs of Mold in Your Home
6. Ignoring Expansion Gaps
Tile, grout, and the house itself all expand and contract with temperature changes. In Las Vegas, where temperatures can swing 40 degrees in a single day, this is particularly important. If you butt your tiles tight against the walls or cabinets, the pressure has nowhere to go, causing the tiles to “tent” or pop off the floor.
How to Avoid It: Always leave a small expansion gap (about 1/4 inch) around the perimeter of the room and where the tile meets fixed objects like cabinets or bathtubs. Don’t worry about the gap—it will be hidden by your baseboards or a bead of color-matched caulk.
7. Incorrect Grout Consistency and Timing
Grout is the finishing touch, but it’s also where many projects go wrong. Mixing grout with too much water makes it weak and prone to cracking while mixing it too thick makes it impossible to push into the joints. Furthermore, many DIYers wait too long to wipe away the excess, leading to a “haze” that is incredibly difficult to remove later.
How to Avoid It: Aim for a “peanut butter” consistency when mixing. Let the grout “slake” (sit) for 10 minutes after mixing to allow the chemicals to activate, then remix briefly. Work in small sections (about 10-15 square feet) so you can wipe away the excess with a damp (not dripping!) sponge before it hardens too much.
8. Messy Caulking and Sealant Lines
In corners and where different surfaces meet (like a backsplash meeting a countertop), you should never use grout. Grout is rigid and will crack as the house settles. Instead, these “change-of-plane” joints require flexible caulk. A messy, jagged caulk line can ruin the look of an otherwise perfect tile job.
How to Avoid It: Use color-matched 100% silicone caulk for wet areas. To get a perfect line, use painter’s tape to define the edges of the joint, apply the caulk, smooth it with a wet finger, and then immediately peel the tape. This creates a clean, professional edge that protects your home from water damage.
Read Also: Water Damage Repair in Las Vegas: What Homeowners Should Do First
9. Rushing the Cutting Process
Cutting tile is intimidating. Using a manual “snap” cutter often results in jagged edges or shattered tiles, especially with hard materials like porcelain. Rushing through cuts leads to waste and poor fits around outlets or plumbing fixtures.
How to Avoid It: Rent or buy a high-quality wet saw with a diamond blade. The water cools the blade and prevents the tile from overheating and cracking. For circular cuts or notches, use a pair of tile nippers or a diamond hole saw bit. Remember the golden rule: measure twice, cut once.
10. Skipping the Final Cleanup and Sealing
You’ve finished the project, and it looks great—until it dries. Grout haze is a thin film of cement and polymers that sits on the surface of the tile. If left too long, it can dull the finish of your beautiful new tiles. Additionally, if you’re using natural stone or porous grout, failing to seal it will lead to permanent staining.
How to Avoid It: Use a dedicated grout haze remover and a microfiber cloth 24 hours after grouting. Once the grout has fully cured (usually 48-72 hours), apply a high-quality grout sealer. For Las Vegas residents dealing with hard water, sealing your grout is the best way to prevent unsightly mineral buildup and discoloration.
Why Choose a Professional Handyman in Las Vegas?
While DIY tiling is possible, the risks of expensive mistakes are high. In the Las Vegas heat, mortar can dry prematurely, and large-format tiles common in modern NV homes require specialized equipment. Hiring a professional from Call 4 Handyman Las Vegas ensures that your subfloor is correctly prepped, your layout is perfectly centered, and your finish is flawless. We handle everything from minor repairs to full kitchen and bathroom transformations.
FAQs
1. Can I install new tile over old tile?
Yes, but only if the existing tile is firmly bonded and the floor is level. You must also “scuff” the surface of the old tile to ensure the new adhesive can grip it.
2. How long does tile installation usually take?
For a standard bathroom, expect 3 to 5 days. This includes prep, layout, setting the tile, allowing it to cure, and grouting.
3. What is “lippage” and how do I avoid it?
Lippage is when the edge of one tile is higher than the one next to it. You can avoid it by using a tile leveling system and ensuring your subfloor is perfectly flat.
4. Do I really need to seal my grout?
Unless you are using epoxy grout, yes. Sealing prevents stains and makes your floor much easier to maintain.
5. Why is my grout cracking only a few weeks after installation?
Cracked grout is usually a sign of movement. This could be due to a flexible subfloor, not using a backer board, or mixing the grout with too much water during installation.
6. What is the best tile for a high-traffic area in a Las Vegas home?
Porcelain tile is the gold standard. It is denser and harder than ceramic, making it highly resistant to scratches, moisture, and the wear and tear of a busy household.
Conclusion
A beautiful tile floor or wall can last a lifetime, but only if it’s installed with precision and care. While DIY projects can be rewarding, the complexities of subfloor prep, layout, and climate-specific curing in Las Vegas often make professional installation the smarter investment. You’re well on your way to a stunning home upgrade by avoiding these ten common mistakes.
If you’d rather skip the stress and ensure a flawless, guaranteed result, the experts at Call 4 Handyman Las Vegas are here to help. We bring professional tools and years of experience to every job, from small repairs to full-scale remodels.